
Create your first CMS collection and article pages
Separate article data from page design, connect an index and detail page, and test two genuinely different records.
Soidesmax · 4 min read · Updated 2026-10-20
The goal: edit content once
North Studio needs a Journal. Instead of drawing a separate page for every article, use a collection for the content and a shared layout for displaying each item. Think of a collection as a structured notebook: one item per article, with the same named fields on every item.
Framer's CMS interface changed in 2026. Older lessons can still explain the concepts, but their button locations may differ. The current Academy includes a CMS Index Page workflow; follow the labels you actually see and use the official references below when an older video differs.
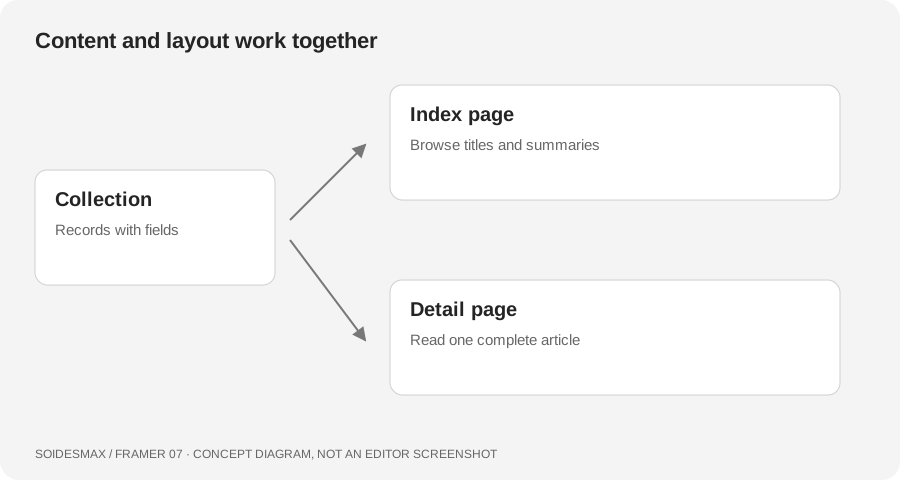
Original CMS diagram. This website's own blog uses Supabase; the steps here teach CMS inside Framer.
1. Define a tiny content model
Open the CMS and create a collection for Journal articles. Use clear field names such as Title, Summary, Cover, Body and Published Date. Choose image, text, formatted-text and date fields according to their purpose. Review the built-in slug and publication status rather than creating confusing duplicates.
For this exercise, prepare two short, fictional articles: Our first studio day and How we organize a project. Give them different titles, summaries, dates and body lengths. Two different items make incorrect bindings easier to spot than ten identical placeholders.
You can set up content manually. Framer's current Agent can also help create or import a collection, but generated text needs your review. AI is optional for this lesson; it is not a prerequisite for understanding the collection.
2. Build an index
In Pages, choose New CMS Page, select the collection and choose Index Page where available. The index is where readers browse previews. Inside the repeated item, bind the headline to Title, the image to Cover and the description to Summary. Use the property's variable control rather than typing the first item's title into every card.
Give the index a useful empty state. Try a narrow screen and confirm the cards reorganize without sideways scrolling.
3. Connect the detail page
Use a CMS detail layout for the full article. Connect its heading and body to the same collection's fields. Set the index card destination to that item's detail page, then open both sample articles in Preview. Each URL should display its own content using the same design.
A repeating title is often a static text mistake. An unrelated article can indicate that the destination or collection binding is wrong. Inspect those connections before duplicating more pages.
4. Review status, URLs and sorting
Keep unfinished material in draft. Choose meaningful slugs before launch; changing an established URL later requires redirect planning. Sort the index intentionally, for example by your chosen publication date. Do not assume the order you created records is the order readers should see.
Completion checklist
- Two distinct items display correctly on the index and detail pages.
- A longer body does not push text outside its container.
- Missing optional imagery does not leave a broken-looking card.
- Draft material is not unintentionally included in the live site.
- Links work on the published test site after you publish the intended changes.